I’ve always loved pen tablets for computer interaction ever since the Koala Pad of the 80’s. I was all about the Wacom Art Pad in the 90’s, and then the Windows XP Tablet PC’s when those were first introduced in 2002. Today we have many pen tablet interface options. They’re basically essential for any digital artist. The professional grade pen tablets and pen displays have generally been from Wacom, but these days there are a number of competitors such as XP-Pen. Now we’ve got one of XP-Pen’s new pen displays which features a new X3 chip in the pen for improved sensitivity, and wow… is the pen display itself thin and light!
Specs
The Artist Pro 16’s dimensions are 443.27 x 256.45 x 9mm, with a display area of 340.99 x 191.81mm and a display resolution of 1920 x 1080 pixels. The color gamut is an impressive 99% Adobe RGB! It’s also 94% NTSC and 133% sRGB, but you’re going to want to use Adobe RGB. The contrast ratio is 1000:1 with a 178 degree viewing angle and full lamination. The stylus doesn’t have a battery and supports 8192 levels of pressure sensitivity along with 60 degrees of tilt, a 5080LPI resolution, 10mm reading height, and 200RPS report rate with a center accuracy of +/- 0.5mm and a corner accuracy of +/- 1mm. You’ve got a 5V/2A DC power adapter, too.
What’s in the box

The XP-Pen Artist Pro 16 box has some really cool astronaut artwork on it. The product itself is just a little picture in the corner. Usually the product is the focus in most box art, but it's kind of cool that the artwork is the focus here. Inside the box, under the tablet display, we've got a USA power plug on the left along with a bunch of power adapters for other countries.

The main power supply has folding prongs to make it more portable.

The long grey metal piece has a formed foam inner case that contains the pen, pen tip remover, and 9 replacement pen tips. The pen holder case has a nice click and push to release enclosure.

Of course you get some warranty information and a manual. Nicely, you also get a drawing glove and screen cleaner. I love that it comes with a drawing glove! Those make drawing on pen displays so much better and also help keep the screen clean.

Of course you need some wires to plug this into a computer. The big wire on the left has a USB-C male port on one end (which plugs into the pen display), and three wires on the other end. There is one full sized HDMI male port to go into your computer’s video card, and then there are two full sized USB-A ports. The black one is meant to go into your computer for data transfer, and the red one is meant to go into a power supply. You may not “need” the red one to go to a power supply though. We’ll talk more about that later. On the right, there’s a USB-A cable extender which is great for routing the USB-A power cable to the power adapter.

Hardware and Design

The 16″ display looks great, and the bezel is plenty big enough for fingers and palm resting. I used the XP-Pen Artist Pro 16 with an HP Zbook Power G8 because you really need something with a lot of ports. You need a full sized HDMI port, and two USB-A ports. Well, you really only NEED one USB-A port, while the red one can go into a power plug, but if you have two USB-A ports, then you can power the pen display from the computer.

On the side edge where the USB-C port plugs in, there’s also a power button and a brightness control rocker button. It looks like a volume button, but there are no speakers on this pen display, so it’s for screen brightness. You can also see here how extremely thin this XP-Pen Artist Pro 16 really is.

The back and other edges of the XP-Pen Artist Pro 16 are completely clean. I’m kind of disappointed that there aren’t any rubber feet on the back to keep it from sliding around on a desk or getting scratched. I’m also kind of disappointed that there aren’t any screw holes here for mounting a sturdy multi-angle stand. Of course you could get an easel style holder for it if you really wanted a stand.

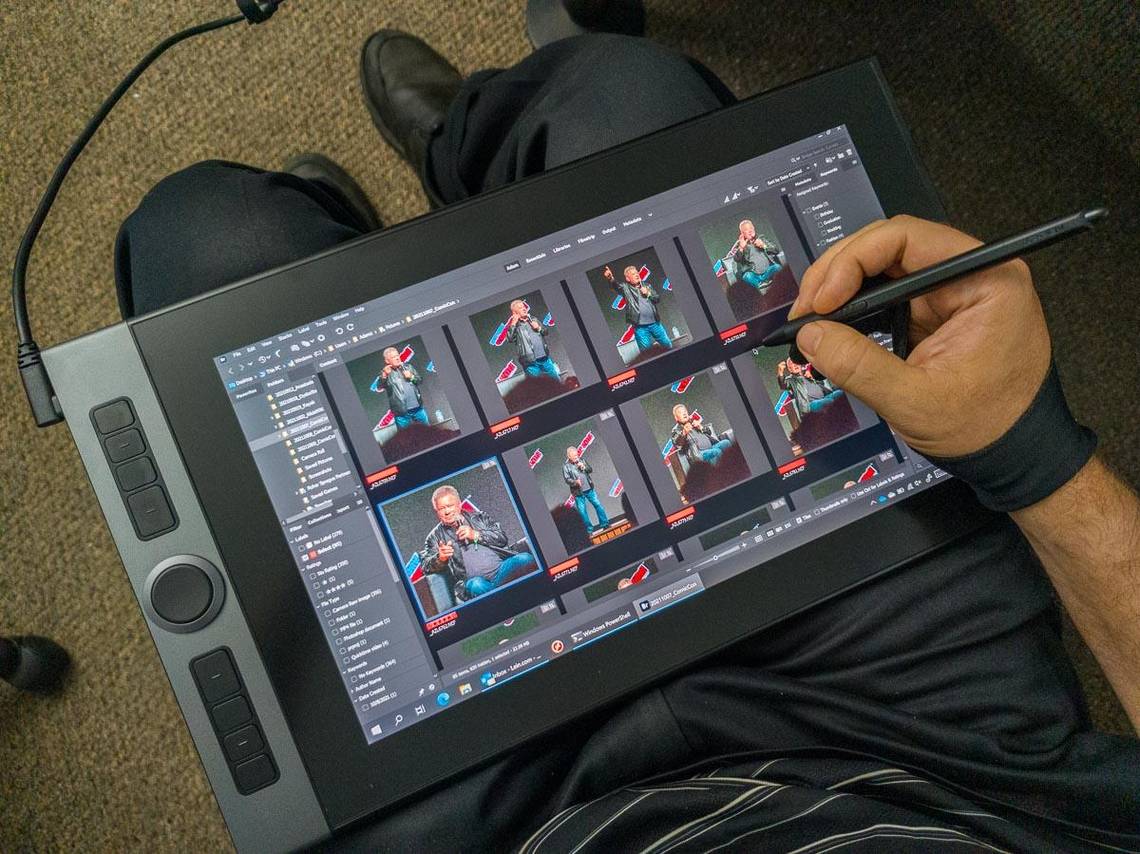
Really, the Artist Pro 16 is more of a lap-top pen display. The completely clean flat back makes it much more comfortable to set on your legs while leaning over to draw or interact with the display. This is a pen display only, by the way. It does not support touch.

Here you can see how the thickness of the XP-Pen Artist Pro 16 compares to the XP-Pen Artist 24 Pro. The 24″ model is much thicker and heavier, but of course that version is meant for desktop usage.

One one side of the pen display bezel there is a series of 8 hardware buttons and a circular wheel. The buttons have different sizes as well as small raised lines in order to make them easy to feel with your fingers. You can find the button you want, simply by feeling for them without having to take your eyes off of the display and the content that you’re working with. This is a huge advantage over capacitive buttons or on-screen buttons. Furthermore, all of these buttons can be programmed for specific functions in each program that you use, so you’ve got a huge amount of flexibility for building efficient workflows.

The pen accuracy and responsiveness is pretty excellent on the Artist Pro 16. This pen display has a new X3 smart chip which improves the pen interface performance and sensitivity. This new technology increases the pen’s sensitivity by 10 times and reduces the initial activation force to under three grams which means a very light touch of the pen tip will activate your selected drawing tool. The X3 chip also reduces the retraction distance to 0.6mm which provides a more steady brushstroke without detection wobbling.

Make sure the power cable is plugged in!
It’s important to note that you’ll want to use BOTH USB-A cables with the Artist Pro 16. One is for data transfer and one is for power. I decided to try using only the one for data and leave the red power cable unplugged just to see what would happen. The pen display actually worked for a little while with just the one cable plugged in, but eventually the laptop crashed with a blue screen of death. So that’s my fault for not using the product as directed. XP-Pen says that it COULD work with just the black cable if the computer was providing enough power to the tablet, so some other system may work that way, but if it doesn’t… it’s because you’re not following the instructions like I did.
Software
You’ll want to go to the XP-Pen website to download the newest driver software as it doesn’t come with anything. The display and pen will probably work somewhat without the driver software, but you’ll have far more configuration options if you install the drivers.

The “Work area” section lets you specify what screen the pen display will affect along with its resolution. Most people will want this to cover the full area.

With the pen settings, you can reprogram the hardware buttons and eraser tip on the pen. Oddly, the upper hardware button is pre-configured as an Eraser by default even though this new X3 pen also has an eraser on the tip. You’ll want to reprogram that pen button to something more useful right away. I went with a left-double-click function as that’s how my computer pens have been configured since 1996.

In the “Shortcut keys” section you can configure the hardware buttons in the bezel to perform whatever functions you want. Note that these can be different for every program that you use if you choose to configure them that way. The interface is a bit awkward as you’ve got to look at the K1- K8 labels and then find the associated drop down menu below in order to change configurations. You likely won’t need to change the configurations very often, so that’s not too big of an issue.

The interface for programming the Express keys is very extensive too.

The “Roller/Touch” settings let you configure the two scroll wheels in the bezel. Again, the “Application” menu at the top will let you add programs that you use and then configure things to behave differently when that application is active. For example, you may want to set the roller to control play scrubbing in a video editor program while you might want to make it control brush size or zooming when you’re in a drawing/painting program. This customization flexibility is hugely important for professionals who need an efficient workflow interface, and the XP-Pen software delivers.

The software even has the ability to disable certain aspects of the software completely. Thankfully an import/export for saving your configuration settings is here as well.
Pricing & Availability
The XP-Pen Artist Pro 16 is only about $449 USD which is about $200 less than Wacom’s Cintiq 16. That’s some significant savings. You can order the XP-Pen Artist Pro 16 from the XP-Pen online store in the USA or in the UK. AND you can get 15% off by using the coupon code: POCKETNOW10 (This offer expires Nov. 30th, 2021, and does not stack with other sales.)
Pros & Cons
- Only 9mm thick
- $449 is a great price for a pen display of this quality
- 8 programmable Express keys and hardware dial in the bezel
- Gorgeous 99% Adobe RGB color gamut and anti-glare screen
- Includes drawing glove to help keep the screen clean
- Requires a lot of wires to attach to a computer (HDMI, USB-A data, USB-A power), no USB-C displayport support
- There’s no easy way to show an overlay of what each of the bezel Express keys is programmed to do while you’re working (in case you forget what you set them as.)
- Stand not included
- No upright pen holder is included. Some may prefer a desktop pen holder for easy pen access.
- No touch support
Conclusion
While I’ve been a huge fan of Wacom pen tablets and displays since the 90’s, XP-Pen has been bringing on the competition hard lately. Wacom doesn’t have any pen display that’s this thin or light and the XP-Pen Artist Pro 16 is even less expensive than Wacom’s similar display sized Cintiq 16 (See our Wacom Cintiq 16 review). The Artist Pro 16 is $200 cheaper at $449! It would have been cool if the Artist Pro 16 could have used only a single USB-C Thunderbolt port for display, data, and electricity instead of the big three cable combo of two USB-A wires and an HDMI cable, but that may not have been technically possible or financially viable at this price point, so you shouldn’t take that as a major criticism. USB-A and HDMI are still very prevalent which means this pen display will work with a larger number of desktop systems. We could assume that this is more targeted towards PC users versus Mac users since many Mac computers don’t even have HDMI or USB-A ports anymore. Still if you’ve got the ports and a computer powerful enough to handle all of the high end graphics programs that you’ll want to use a pen display with, then the XP-Pen Artist Pro 16 is certainly worth a look.