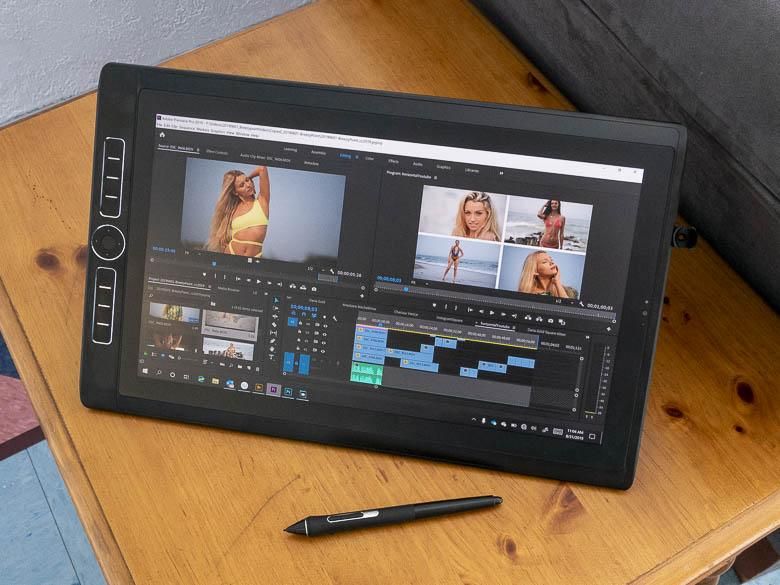
My number one favorite mobile workstation tablet for the past few years has been the Wacom MobileStudio Pro from 2016. It hasn’t aged well though as the internal battery has inflated over the years to push the screen out of the body, ’cause a bit of screen edge bleeding, and reduce the battery life. Thankfully, today we finally get to see the 2019 update to Wacom’s MobileStudio Pro hardware. This is the 16″ version which will be released first. A 13″ version is still in the plan, but won’t be released until later this year.
Now, just as was true with the 2016 model, the Wacom MobileStudio Pro is made for serious professionals in the fields of visual creativity and pen computing. I felt like this started as a response to the Microsoft Surface Pro tablet PC convertibles becoming popular and that’s a good thing because Wacom does pen computing so much better than Microsoft (and N-Trig) that it makes a lot of sense for Wacom to build full computers into their tablet displays.
There has been a bit more competition in the Creative Pro tablet arena lately as well. Wacom even helped HP with the awesome HP ZBook X2 (reviewed here) which, I would say, is a very capable competitor to the Wacom MobileStudio Pro. Read on to see how the new 2019 Wacom MobileStudio Pro stacks up as a professional grade tablet PC.
Specs
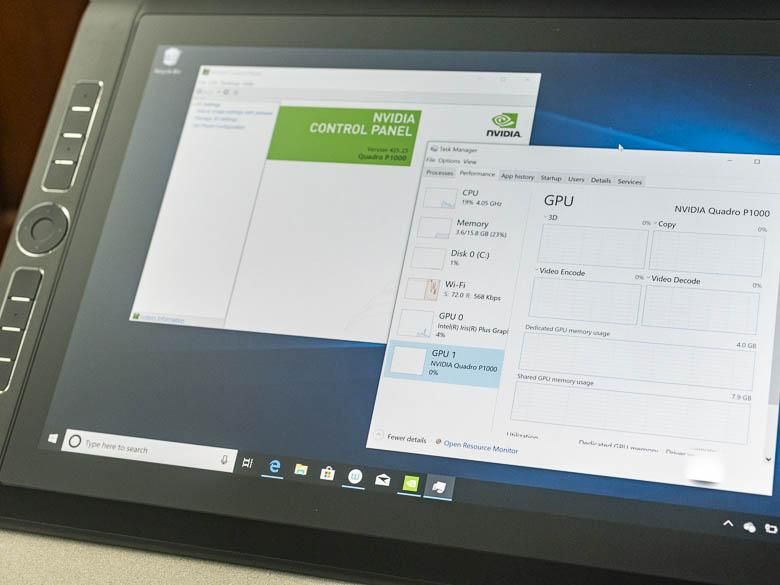
This 16″ version of the Wacom MobileStudio Pro has some significant internal hardware upgrades. It’s running on a newer Intel Core i7-8559U CPU @ 2.7Ghz which can boost up to 4.5Ghz. There’s a 512Gb SSD for storage and 16Gb of RAM for running your programs. Both of those are upgradable now as well and that’s a great addition! We’ve also got two graphics processing units inside. There’s an NVIDIA Quadro P1000 with 4Gb of GPU memory for your high-end graphics programs, and there’s an Intel Iris Plus Graphics 655 GPU for power saving graphics when you’re running on battery power. The cameras on the front and rear have been downgraded to simple 2.1Mp cameras instead of the RealSense 3D scanning capable ones some of the 2016 models came with.
For the display, we’ve got a 4K 3840×2160 pixel screen with 85% Adobe RGB (CIE 1931) color space along with Wacom’s usual pro-grade EMR electro-magnetic resonance layer for Pro Pen 2 tilt recognition and 8192 levels of pressure sensitivity.
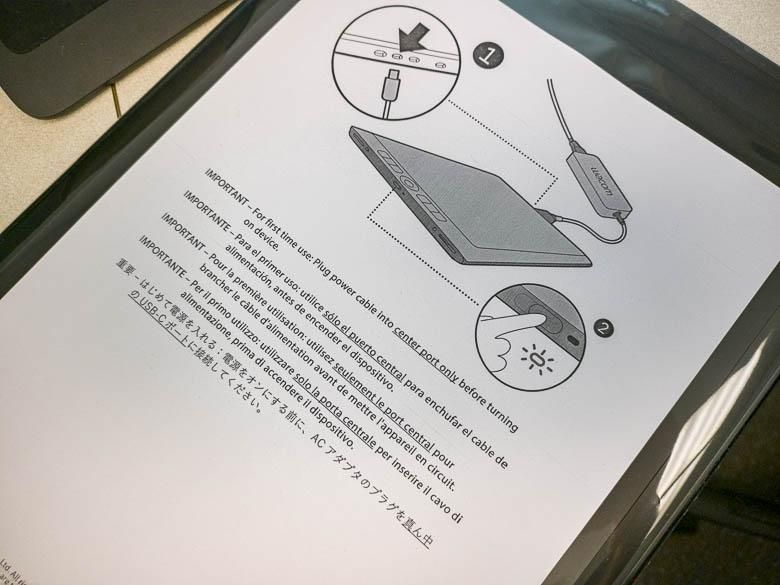
The first thing you’ll see in the box is a print out stuck to the MobileStudio Pro with instructions for using the center USB-C port to charge the device initially. I’m not sure why this is, since after the initial charge, all three USB-C ports seem to accept the charger. Incidentally, these USB-C ports now support Thunderbolt 3 40Gbps connectivity. That means you can connect up to two more 4K displays or a variety of other peripherals.
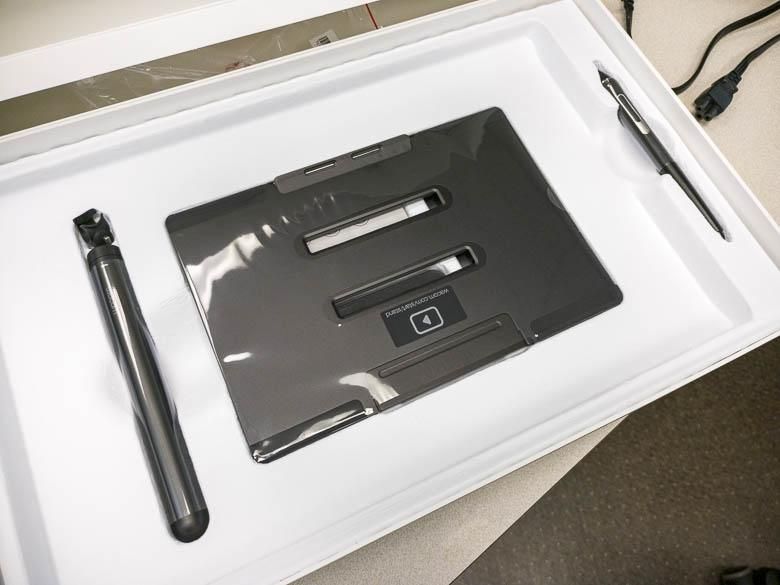
Another very pleasant upgrade from the 2016 MobileStudio Pros is that the metal stand is now included in the box! This detachable stand originally intended for the 2016 MobileStudio Pro wasn’t released until January of 2018. On the left in the above image, you can also see a plastic case for the Pro Pen 2 which is shown on the right.
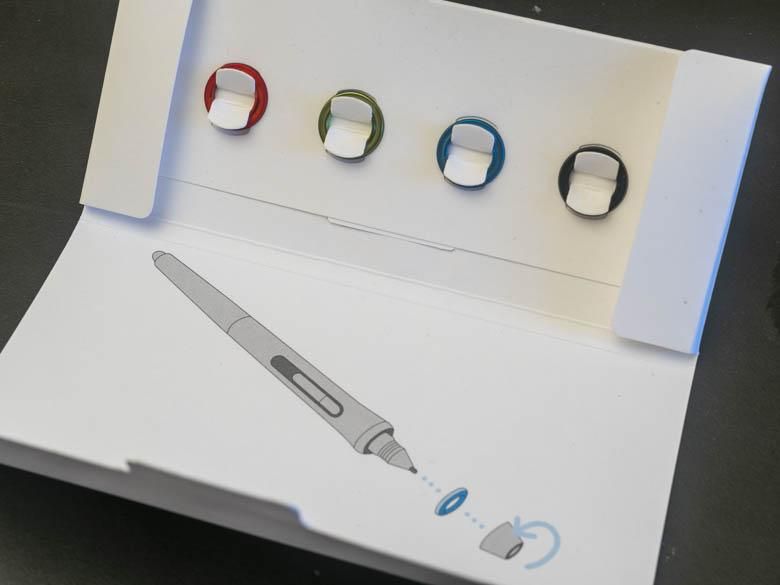
You’ve also got some little plastic colored rings to attach to your Pro Pen 2 in order to differentiate it from your co-workers Pro Pens.
Screen and Pen
Of course, one of the biggest selling points for the Wacom MobileStudio Pro is the pen interface. I was fully converted when I first got a Wacom graphics tablet back in the mid 90’s and today using a mouse or trackpad to interact with a computer feels like using a hammer to put together a watch (especially when it comes to design work). The pen-to-screen interface gives you a direct connection for manipulating computer controls. It’s not disconnected like a mouse or trackpad. Furthermore, you can build motor-memory since the location where you place the pen tip is always going to have the same relationship to the dimensions of the screen you’re looking at. That’s never true with a mouse or trackpad so often you’ve got to spend a couple seconds looking at the screen and moving the pointer around to figure out where it is. With a Wacom pen, you place it and it’s there. I can even do this without looking at the screen and have accurate cursor control.
A touch screen also gives you direct interactivity with graphic user interface controls, but fingers are big. Each finger is going to cover from 100-300^2 pixels worth of data and buttons need to be that big to be activated. That’s a huge waste of space and a huge crutch for efficiency.
The exterior layer of the screen is a matte material as many professional grade tablet PCs and laptops are these days. It reduces glare so that you can see the screen better. I honestly don’t understand how people can tolerate using MacBook Pros and iMacs with their highly reflective glossy screens.
As with previous versions, the screen subtly flexes when you apply pressure. You might think that would be a durability problem, but bendable things are less breakable. So I’m imagining this won’t shatter as easily as a glass screen. It also feels much more natural to interact with and that’s a huge plus. If you’ve used a Microsoft Surface Pro/Book/Studio or an iPad Pro with Apple Pencil… yeah, they have great pressure sensitivity and you can write on the screen and accurately control the thickness of the stroke, but it still feels like plastic on glass. This feels much more comfortable. It doesn’t feel exactly like writing with a pencil on paper, but the matte screen texture, the flexing, and the practically perfect pen easily offer the best pen interface on the market.
While a precise pen interface is very important to anyone in the visual creative fields, so is color accuracy. The 2019 Wacom MobileStudio Pro 16 can be fully callibrated, but it now only supports 85% of the Adobe RGB 1998 color gamut as opposed to the 94% and 96% levels that the 2016 models had. I’m not sure why this changed, but if a wider color gamut is important, the HP zBook X2 that Wacom also worked on has a 100% Adobe RGB Dreamcolor display.
Hardware & Tactile Buttons
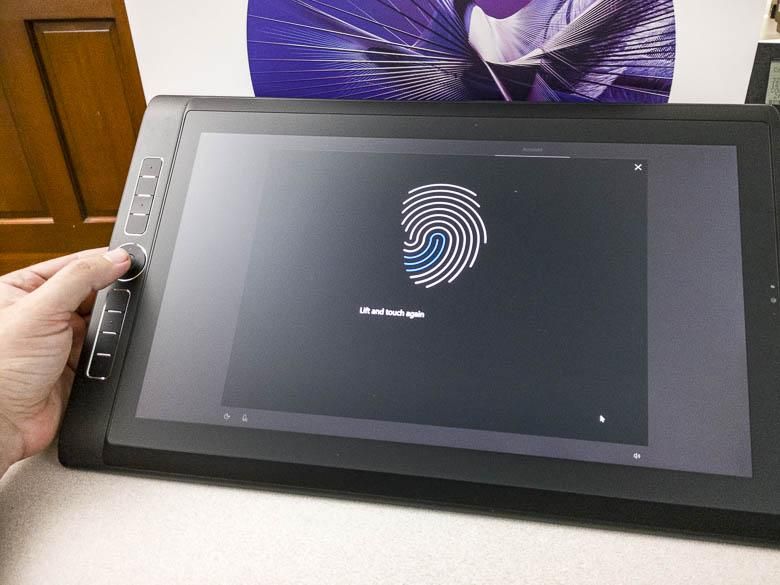
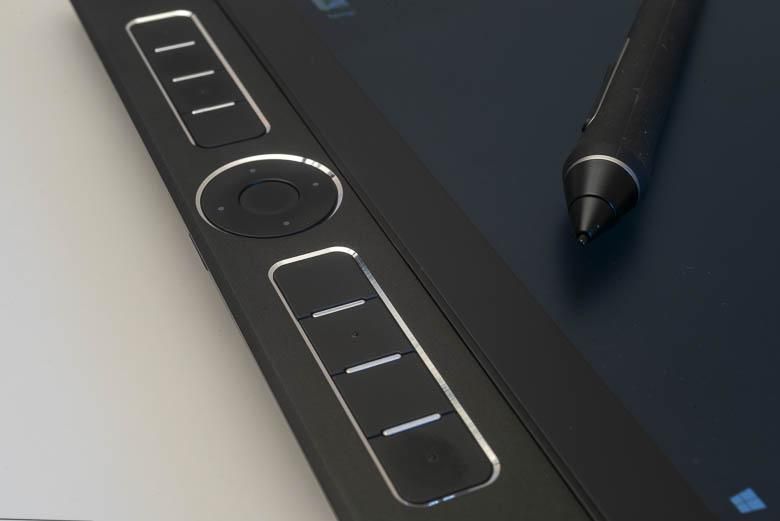
One of my favorite things about the Wacom MobileStudio Pro… besides the pen interface, is the customizable hardware keys in the bezel. The center circular button has a fingerprint scanner in the middle. Pressing the middle activates the start menu by default, and then there’s a 4-way outer ring that lets you switch the scroll wheel between 4 other different functions of your choosing.
We’ve also got 8 flat buttons in the bezel. There’s a little nib on opposing buttons so that you can feel which is which without having to look at them. This is very important for being able to quickly feel which button is which and build motor memory for the button locations.
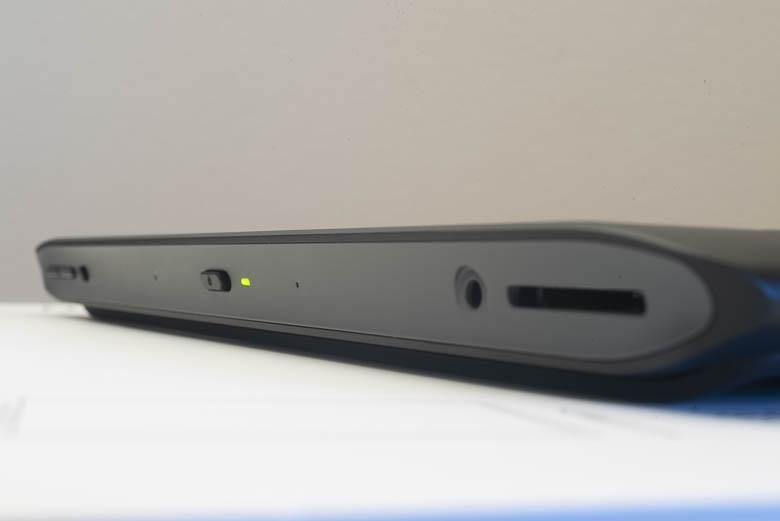
One one edge, you’ll find speaker volume up/down controls, a switch to toggle auto-rotate, a spring loaded switch for power on/off/sleep, a 3.5mm headset jack, and a full-sized SD card slot. I love having a full sized SD card reader built into this. Not having to plug in some kind of adapter in order to access the photos and videos from any of my cameras is a great advantage.
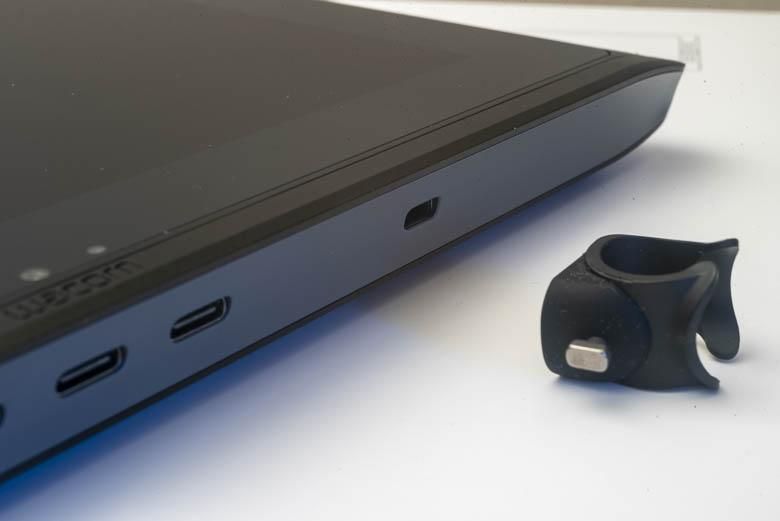
On the side with the USB-C ports, there’s also a hole for a lock if you want to secure the tablet PC to a desk. This hole can also be used for the included pen holder.
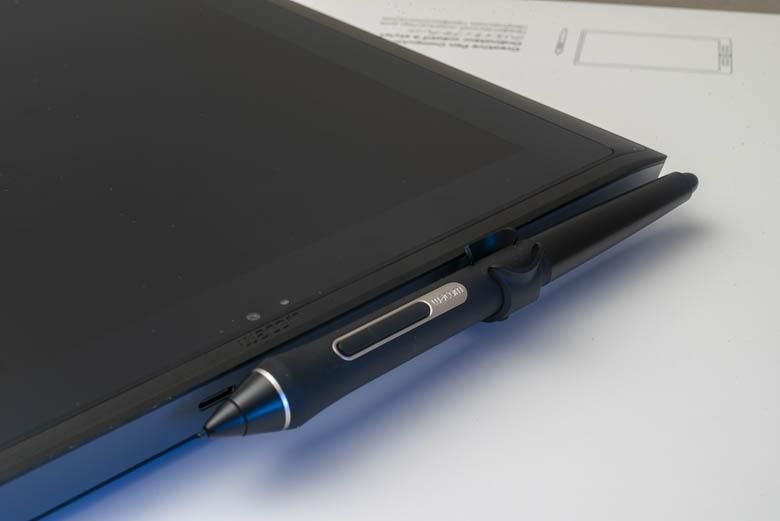
The little plastic ring can be used to hold the pen against the edge of the tablet PC in case you don’t want to use the separate Pen Pro 2 case.
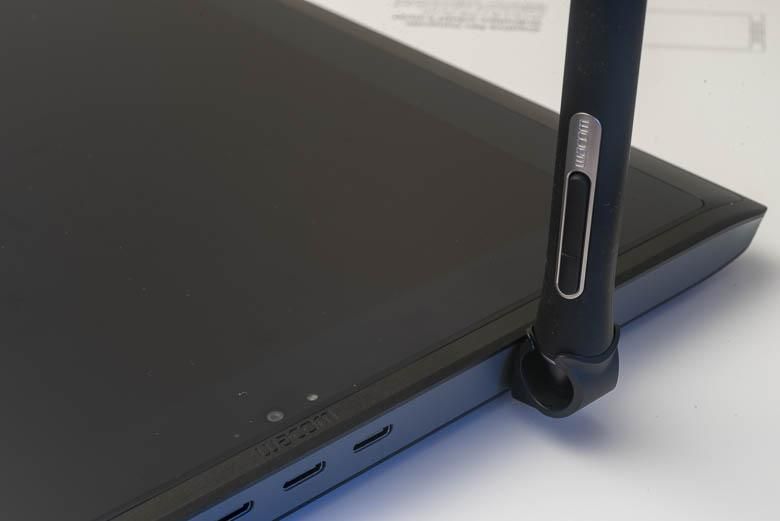
The pen can also be set into the holder vertically. This is not a sturdy travel-friendly position, but if you’re working and need to switch to a keyboard, setting the pen down like this is extremely convenient and makes the pen very easy to pick back up and continue working with. Normally with other Wacom products, you’d get a separate weighted circular “donut” shaped pen holder that you can set anywhere on your desk, but this solution is much more mobile-friendly.
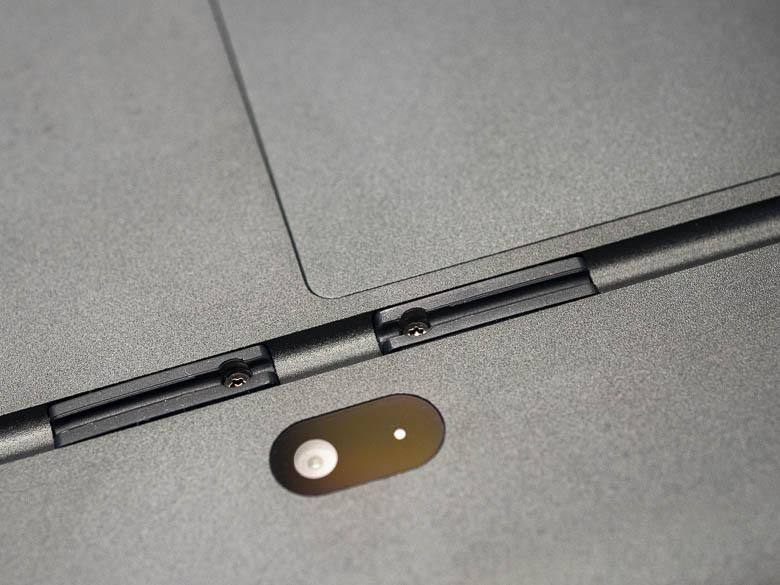
You’ll also see the 5Mp front facing camera on the front of the MobileStudio on the above edge. It’s centered on this bezel because you may need to flip the device depending on if you like to work left handed or right handed.
On the back you’ll see the rear-facing 8Mp camera. This is a very basic camera and oddly only shoots in 1920×1080 pixel HD resolution using the Windows 10 camera software. You’ll no longer see a 3D scanning camera on the new MobileStudio Pro’s and that’s fine because it was kind of a gimmick that didn’t really work very well anyway. This new model is more focused on what Wacom does best.
You’ll also see 4 little plastic hinges on the back. This is where the detachable metal stand can be installed.
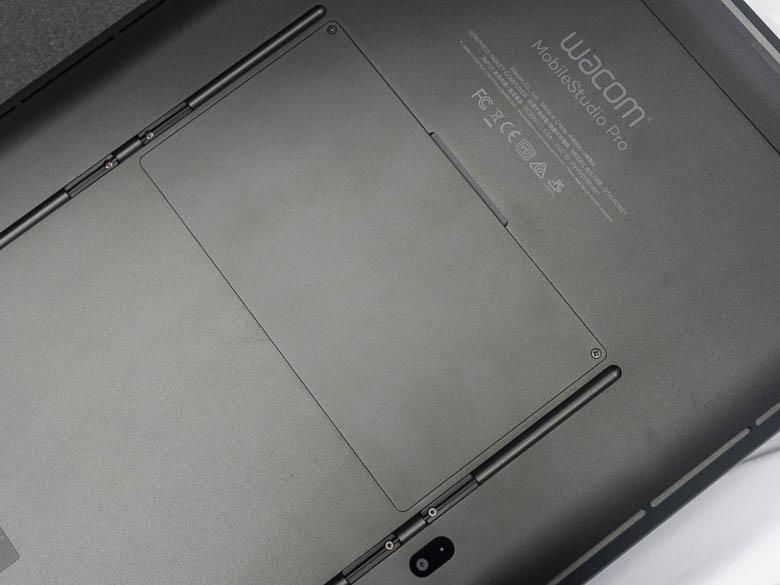
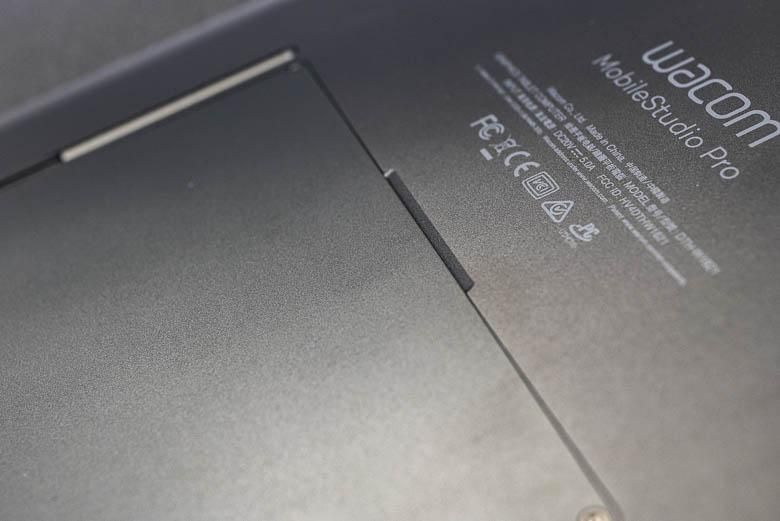
Another important change to the MobileStudio Pro is this door on the back that’s held shut with two little Philips head screws. Behind that door you’ll be able to take out the RAM modules and SSD module and replace them with different versions. In other words if you need more than 512Gb of SSD storage and more than 16Gb of RAM, all you have to do is buy more and plug it in. You don’t have to buy a whole new tablet.
Unfortunately, my biggest feature request from the 2016 MobileStudio Pros… a removable battery… was not implemented in this version. The internal batteries are almost always the first thing to wear out when it comes to portable electronic devices. The number of times I’ve had inflated batteries in phones and laptops greatly out numbers any other hardware problem I’ve seen. Hopefully the battery quality in this new 2019 model will allow it to last much longer.
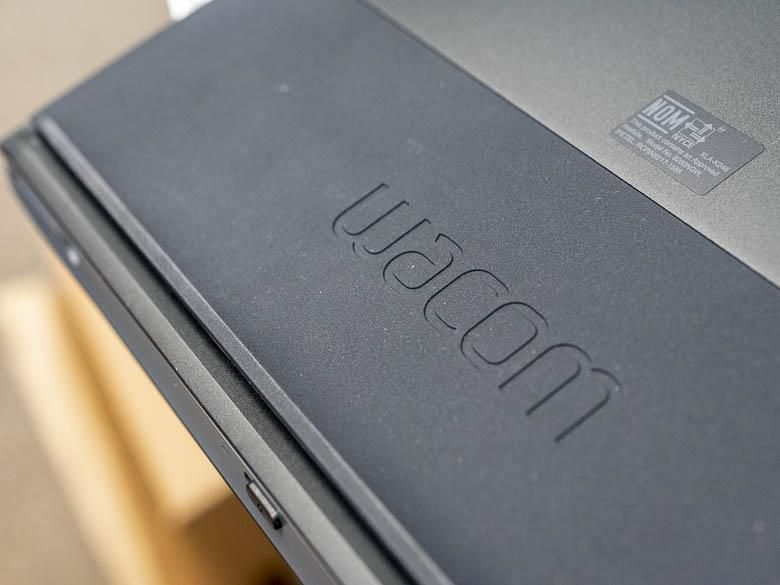
On the sides of the back, again there are rubber bumper areas. These are useful if you’re laying the tablet PC flat on a table or desk as they’ll keep it stable, but you’ll also see a slit on the edges of these bumpers. This is for airflow from the internal fans. These vents are smartly placed in a position where they are least likely to be blocked if you’re holding the tablet on your lap or on a desk or with your hands.
By the way, the fans in the MobileStudio Pro can be quite loud so don’t expect to do much audio work with this device.
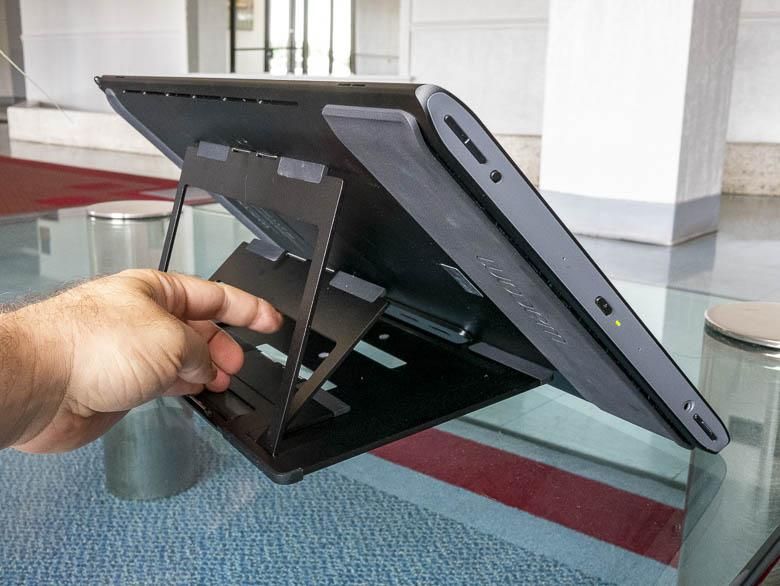
The included metal stand can be installed to support either a left handed configuration or a right handed configuration. Many pen-based computing manufacturers don’t take into account designing devices that can be customized for use by left and right handed users. It’s usually one or the other, so Wacom is very smart about this.
The stand has 4 different angle levels that you can set it up at (including the folded flat level). There are three hinged legs that can unfold, so simply pull out the length that you want to use and attach it to the other slot on the back of the tablet.
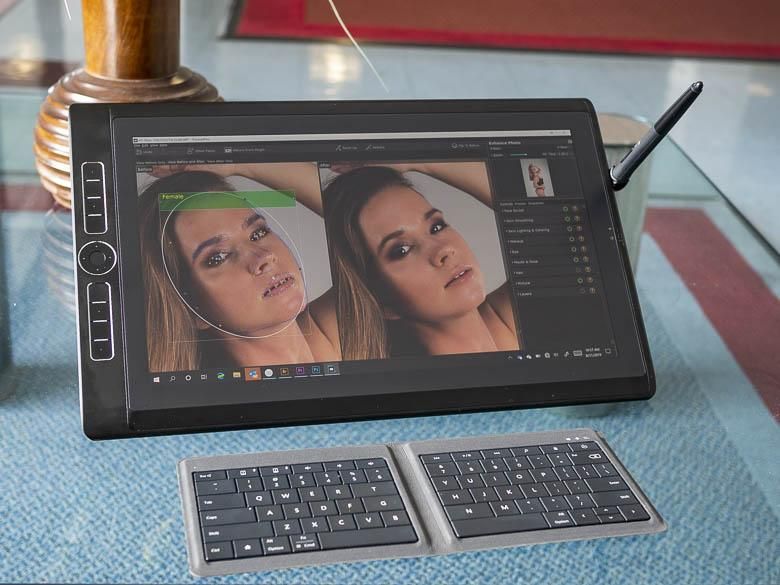
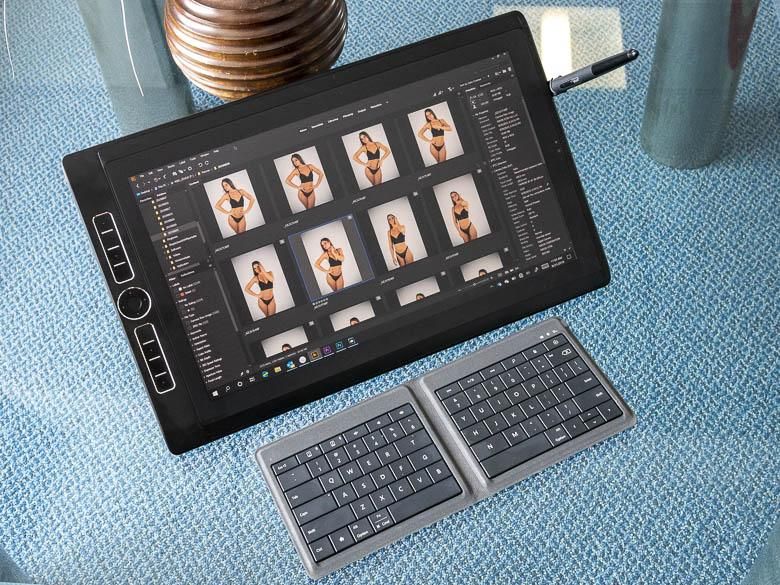
Incidentally, Wacom does not include a special keyboard for the MobileStudio Pro. There’s no detachable keyboard case option either. They do make a wireless keyboard for the older Cintiq Companion, but there’s nothing particularly special about it. You can use any Windows-compatible keyboard that you may already have or might like to buy (that includes pretty much all keyboards, even Mac keyboards). Above you see it works fine with Microsoft’s Universal folding keyboard connected via Bluetooth. Wired keyboards would need either a USB-C interface or a USB-C adapter/port-expander. I like the Microsoft Universal folding keyboard because it’s very compact and can even fold to fit inside a jacket pocket.
Software
First of all, the Wacom MobileStudio Pro runs Windows 10 Pro as the operating system. Windows 10 is really the only choice for a high-end pen-computer with a touch screen. MacOS has pretty poor support for touch interaction and Apple doesn’t allow anyone else to license the operating system for use on 3rd party hardware anyway.
By default, the MobileStudio Pro loads Windows 10’s desktop mode even though there’s no keyboard or mouse attached. That’s good for people who are familiar with the Windows 95 through Windows 7 style user interface, but personally I highly recommend switching into the Windows 10 tablet mode UI using the quick action center in the bottom right corner button. It’s much more touch-friendly and enables some nice snapping and application closing gestures. I even set the bottom taskbar to auto-hide to make more room for the real programs.
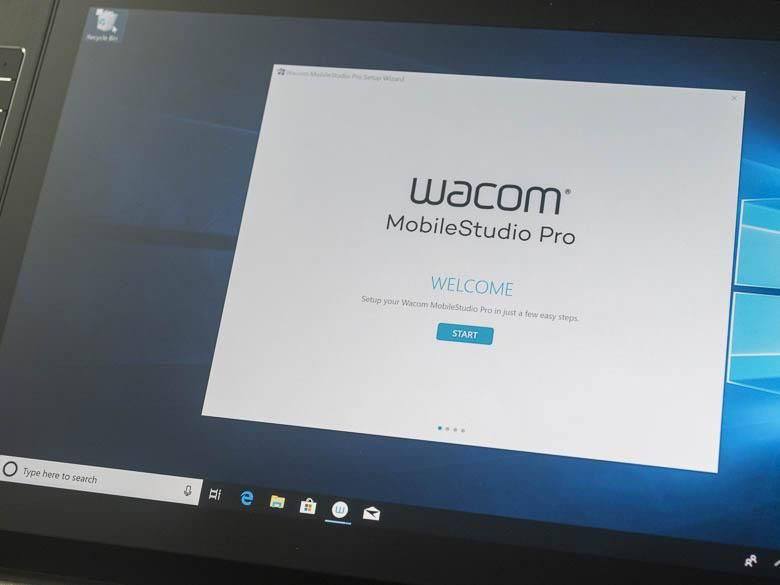
On first boot, after the normal Windows 10 setup, you’ll also get a little welcome screen from Wacom’s included software.
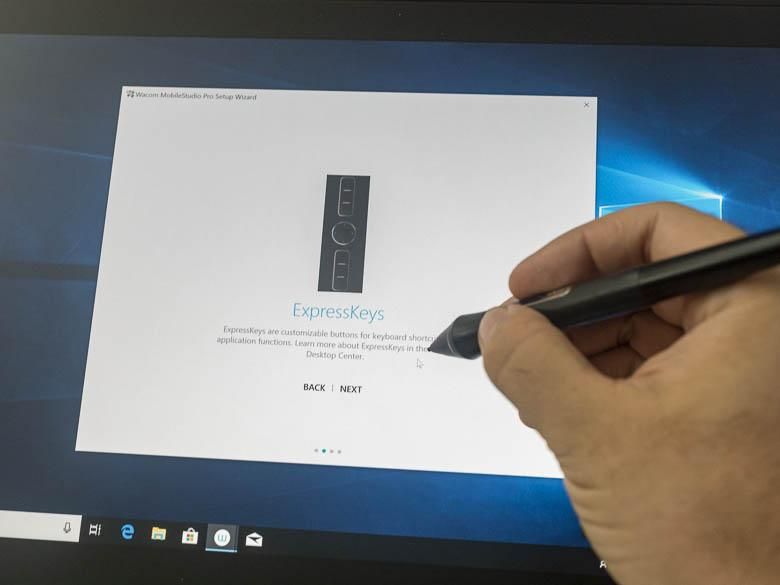
This simply introduces you to the basics and goes through a few of the features that Wacom has added.
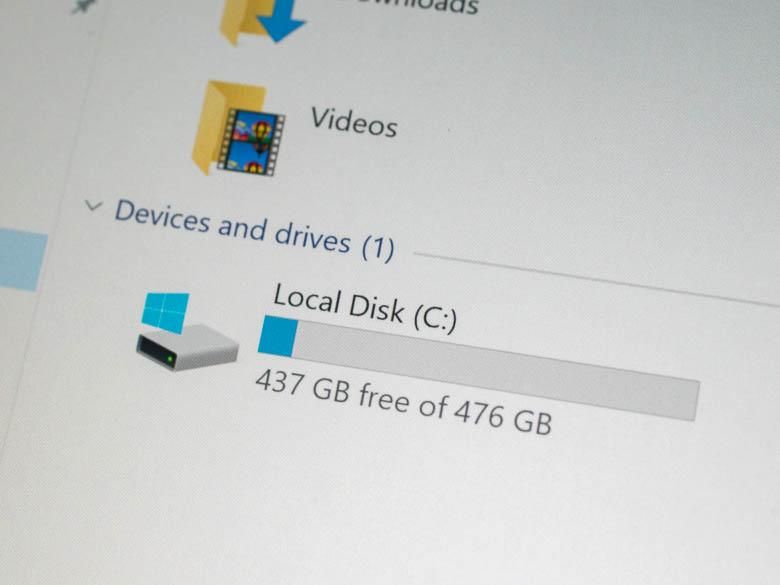
After first boot, you’ll have plenty of free space on the 512Gb SSD.
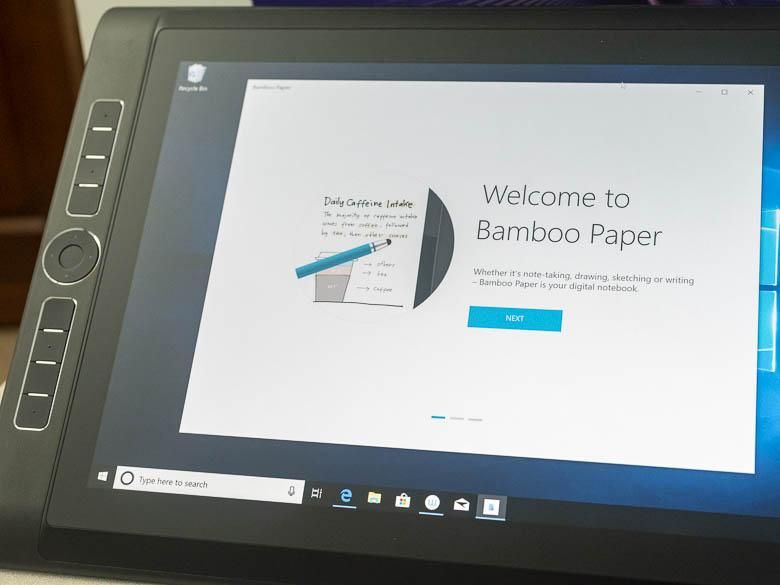
Besides the awesome Wacom driver software that we’ll dig into some more below, you also get an included copy of Wacom’s Bamboo Paper app. This is an extremely basic ink note taking app. It’s nice that it’s included, but I don’t think this will be terribly useful for a pro. You’re better off installing the x86 Desktop version of Microsoft OneNote 2016 for your note-taking needs. Don’t use the one included with Windows 10 because that does not work well with a pen (you can’t select content).
The MobileStudio Pro ships with Windows 10 version 1803, but you can upgrade to the current 1903 version pretty easily. Ever since the Windows 10 Fall Creator’s Update, Windows 10’s pen behavior has been kind of a let down. There are some options that will help you out with this though.
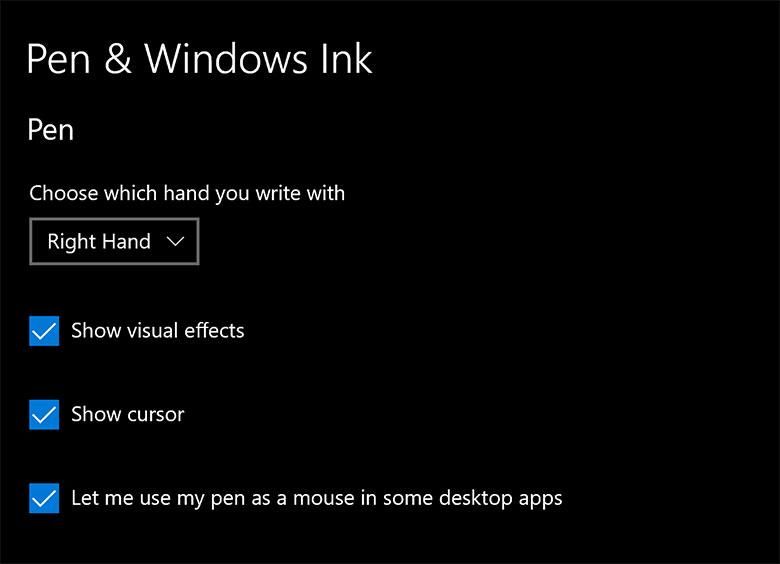
My first recommendation is to search the settings for “Pen & Windows Ink Settings” then make sure the “show cursor” and “Let me use my pen as a mouse in some desktop apps” options are turned on. The “some desktop apps” verbiage is very vague and confusing, but essentially this means Win32 programs… in other words, the real professional grade programs that you’re likely to use on this device as opposed to “Universal Windows Platform” apps that you might get from the Microsoft Store app included with Windows. This option should keep your pen strokes from acting like a finger that scrolls pages.
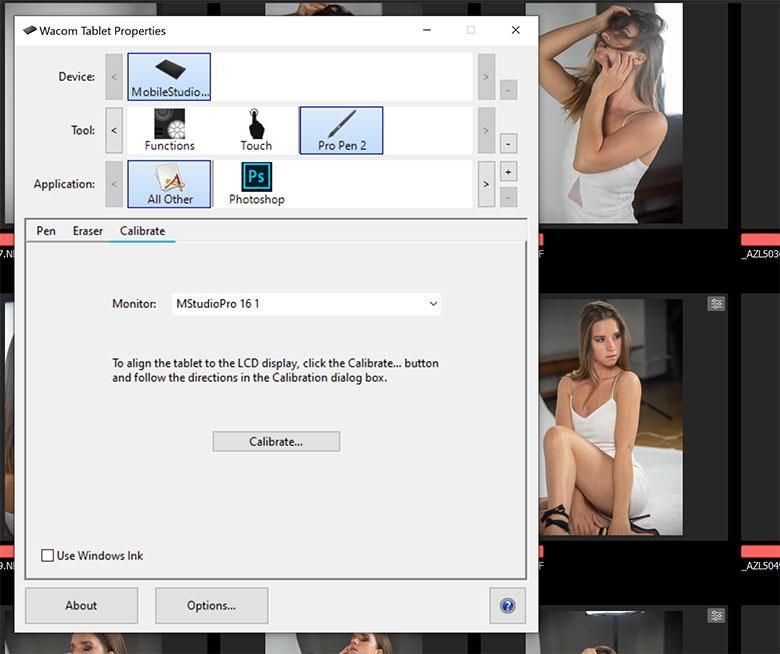
I also highly recommend turning off “Use Windows Ink” in the “Calibration” tab of the Wacom Tablet Properties dialogue. Microsoft’s Windows Ink option can be very problematic and Wacom’s drivers are much better in most cases. However, some programs now prefer “Windows Ink”. For example, Photoshop defaults to requiring Windows Ink for pressure sensitivity. If you want to use Wacom’s drivers in Photoshop, you have to create a text file that changes the preference. Here are some instructions for that if you want to do it.
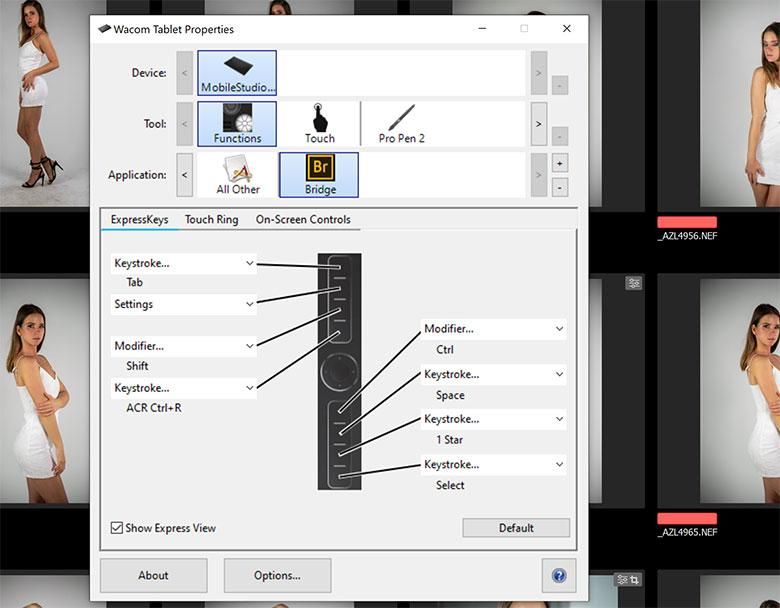
Luckily, Wacom’s driver software also lets you turn on or off the “Windows Ink” interface based on which program you’re currently using. This is extremely powerful and very useful. All you have to do is use the + button in the Application row of the Wacom Tablet Properties… choose the application you want to customize preferences for, and then change the preferences to whatever you want.
For example, in the above screenshot, I’ve customized the express keys functions for when I have Adobe Bridge CC active. I like to use Adobe Bridge for photo culling and editing since it’s so much faster than Lightroom and I’ve also been using it long before Lightroom existed and even before Bridge was released to the public. By customizing the hardware keys and touch ring to include the functions I use most in each program, I’ve created a highly efficient user interface for my left hand while my right hand can keep using the pen for precision work.
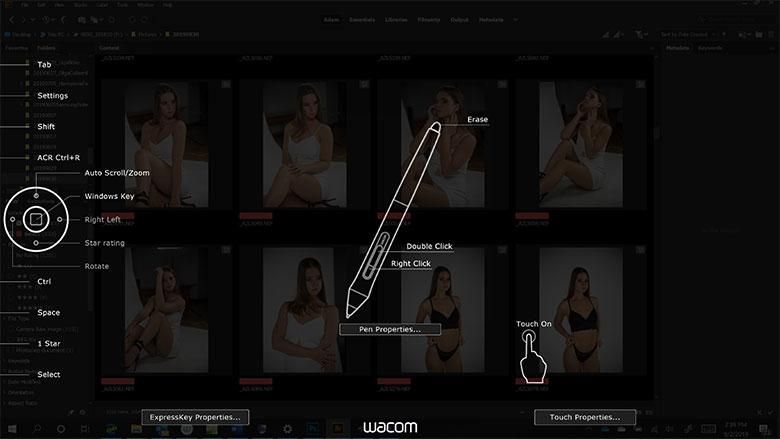
One of the express keys is set to show the settings for the rest of the keys when pressed. Above you can see how this “cheat sheet” looks. It’s extremely useful to keep one of your buttons assigned to this function until you build motor memory for which buttons are programmed to do what in each of your programs.
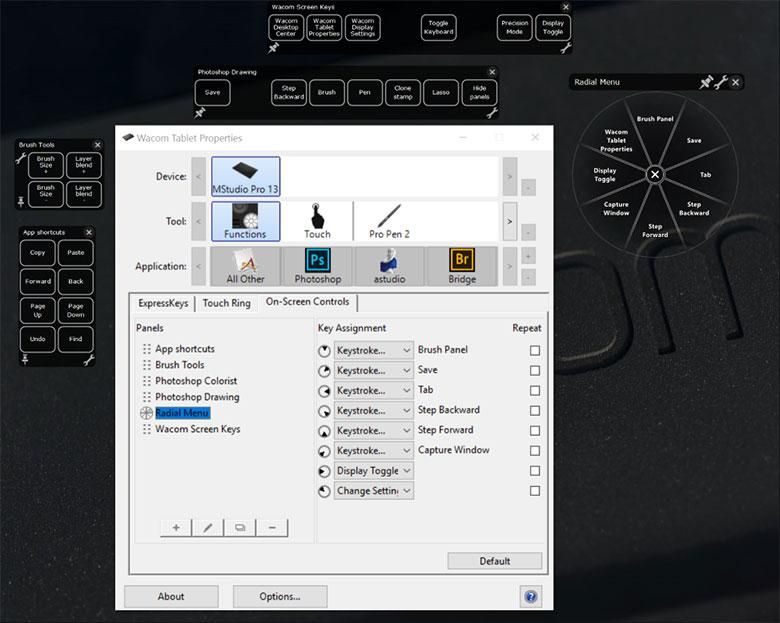
There’s also an “On Screen Controls” tab in the functions section, and this is pretty excellent as well. Basically you can set whatever you want, be it the pen’s hardware button, a bezel button, or a touch gesture… to invoke a radial menu on the screen. And yes, you guessed it, the radial menu can have buttons for whatever you want it to do, and you can make it have different buttons for whichever program you’re using.
That’s not all folks. You can also create any number of custom touch-screen panels with whatever buttons you want to create. Each of those panels can be activated using any of the other custom options in the Wacom Tablet Properties dialog box as well (and that’s a lot).
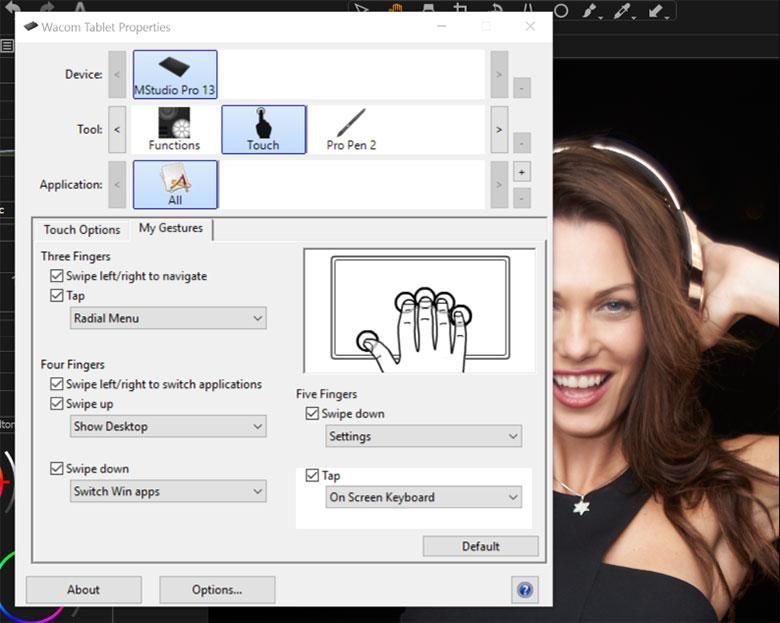
Next is the touch screen gestures. Naturally, you can disable this completely if you want to use only the system or application built-in touch screen gestures, but you can also add a few gestures here that aren’t commonly used in other programs. Above you can see a listing of all the touch screen gestures that are customizable. The “three finger swipe left/right to navigate” and “four finger swipe left/right to switch applications” gestures can only be enabled or disabled, while all of the others can be completely customized to activate whatever command you want. Again, the default functions are available in all applications until you add another application to the application listing in the 3rd row. Then with that application icon selected in the Wacom Tablet Properties dialog, you can choose completely different touch gesture functions for when that particular application is in use in the foreground. So for example, maybe you’ve written a script for InDesign CC that converts all text to outlines. You can assign a keyboard shortcut to that script in InDesign, and then assign the “Five Fingers Swipe Down” gesture to that keyboard shortcut when InDesign is active in order to run that script very easily. By the way, if you don’t have a keyboard connected, you can use the “Standard Layout” on-screen keyboard to specify or activate keyboard shortcuts (enabled in the keyboard settings).
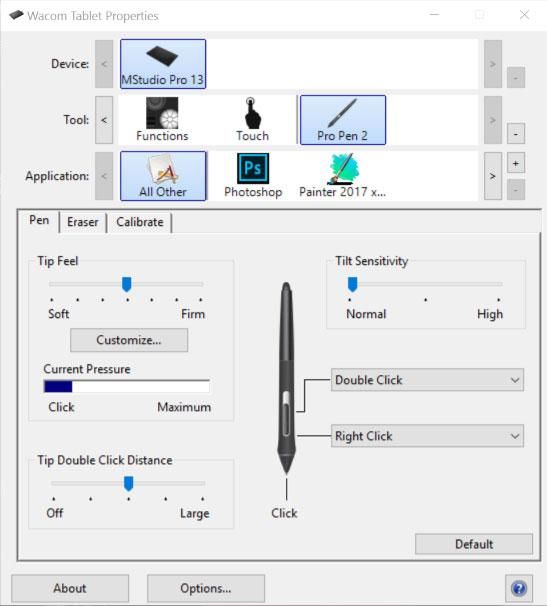
The Pro Pen 2 customization options allow you to fine tune the pressure sensitivity as well as customize the two hardware buttons on the pen. There are sliders for most functions, but if you want more granular control over the tip feel, the “customize” button above will give you a pressure sensitivity curve graph. Again, all of this is customizable on both a system-wide and application-specific level.
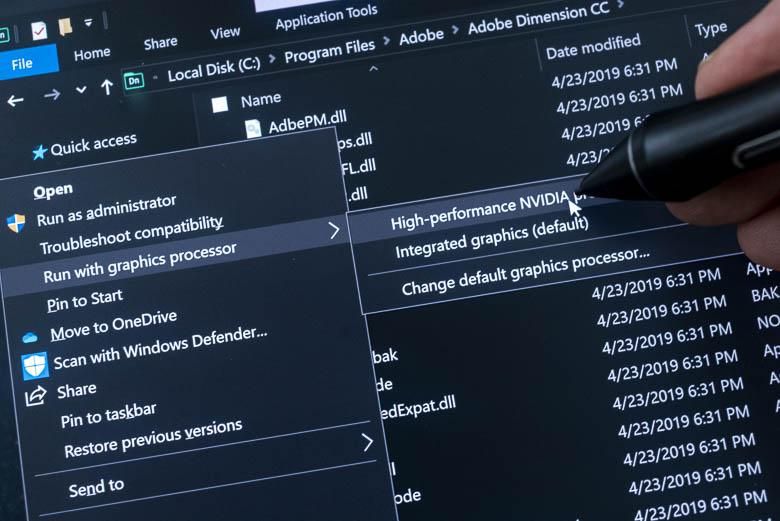
Now because there are two graphics processors built into the Wacom MobileStudio Pro 16, some applications may use the wrong one by default. For example, Adobe Dimensions CC 2019 doesn’t automatically use the high-performance NVIDIA GPU and complains about this when you first launch. Adobe Dimensions is a nice 3D design program, so you’re going to want to make it use that NVIDIA Quadro GPU! Using the Windows File Explorer, navigate to the program’s location and right click the EXE file. From the pop-up context sensitive menu, you can choose “Run with graphics processor” > “Change default graphics processor…” and then set it to use the NVIDIA GPU instead of the integrated Intel GPU. Subsequent launches of whichever program you did this for will use the NVIDIA GPU from now on.
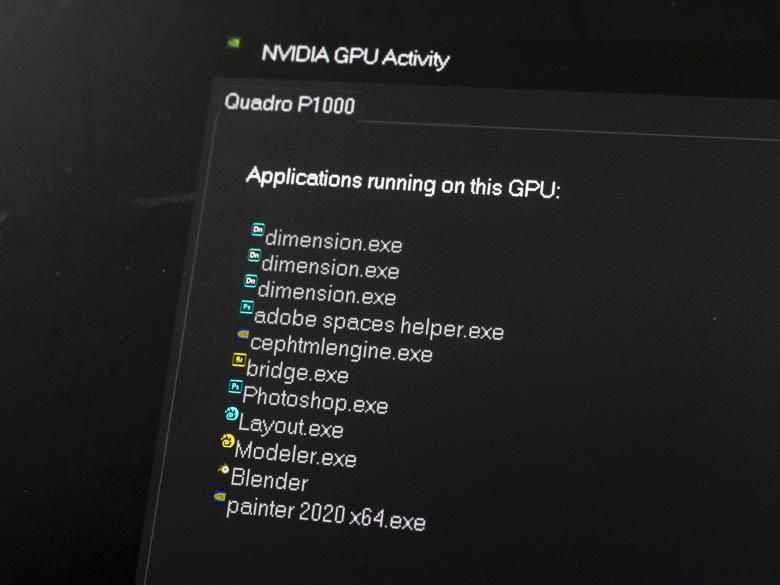
In the bottom right “system tray” area of Windows 10, there’s a little icon that will show you “NVIDIA GPU Activity”. This is useful for listing which programs are taking advantage of the NVIDIA Quadro P1000.
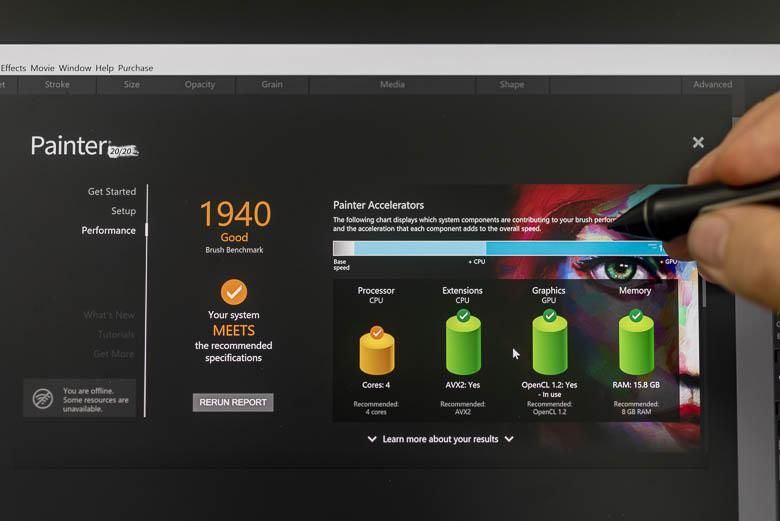
If you intend to use the most robust natural media simulation software around; Corel Painter 2020… you’re going to want to run the “Brush Accelerator” in the Preferences. This will test your system and discover the NVIDIA Quadro P1000 GPU’s capabilities thus enabling better performance in Painter.
Most of the other professional graphics programs I tried on the Wacom MobileStudio Pro 16 recognized the NVIDIA GPU and worked beautifully. Unfortunately, Adobe InDesign CC still does not support GPU acceleration on Windows like its Mac counterpart does, but it’s still very fast and usable on the Wacom MobileStudio Pro.
Wacom Link
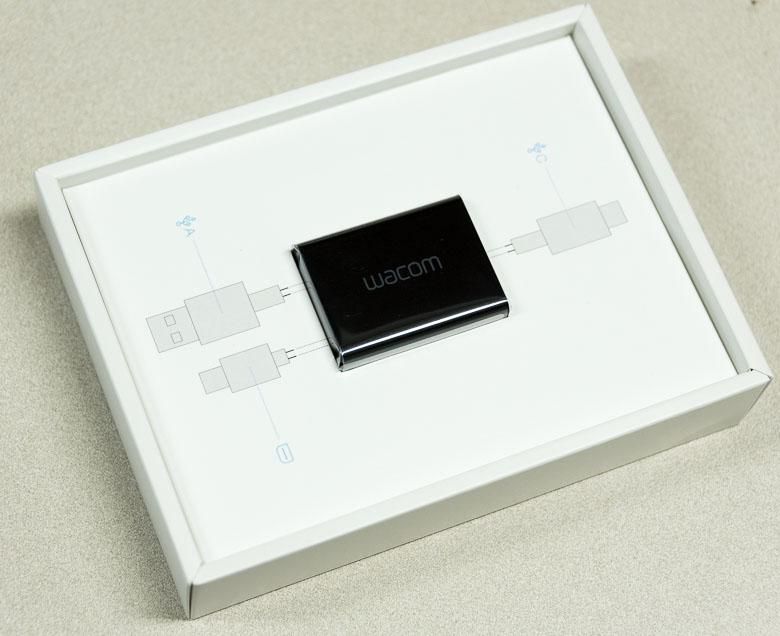
One of the other big selling points of the Wacom MobileStudio Pro devices is the Wacom Link accessory that you can get for them. This is a little adapter that lets you plug the MobileStudio Pro into a larger, more-powerful desktop PC or Mac and let it function as a Cintiq Pen Display. Basically it has two ports on one side that get wired into your big computer, and one port on the other side that plugs into the MobileStudio’s center USB-C port. The accessory includes a USB-A cable to go to your PC/Mac, a Mini-DisplayPort to go to your PC/Mac’s GPU card, and a USB-C cable to go to the MobileStudio Pro.
This can come in very handy if you spend most of your time in an office in front of a powerful desktop computer. You will need the Wacom software drivers installed on the PC or Mac that you’re plugging the Mobile Studio into of course and the MobileStudio Pro will function just like a Cintiq Pen Display when it’s all plugged in. The SD card reader will also show up as a removable drive, which is pretty nice.
Unfortunately I wasn’t able to find the proper display adapter cable to connect the original Wacom Link accessory to an iMac 5K during the week that we had the new MobileStudio Pro 16, so I wasn’t able to fully test this. It may be that you’ll need a newer “Wacom Link Plus” adapter for this functionality on the new Thunderbolt 3 USB-C ports.
Battery Life
Like the original Wacom MobileStudio Pro, the 7.6 V, Li-polymer, 70 Wh battery’s life isn’t as great as one might like. With very light use, you could probably get it to last up to 6 hours, but really we’re talking about maybe 3 hours of use. All of this high-end hardware really eats up the battery, so be prepared to pack the charger or bring a big external battery or buy two MobileStudio Pros. Average phone USB-C chargers don’t work, by the way. You’ll need the big beefy USB-C charger that comes with it.
I really wish this could have had a user-removable battery. It seems like Wacom thought of everything to make this a genuinely useful tool for creative professionals, but its utility is decreased by its short battery life and when that internal battery starts to wear out, it’s going to be even worse. The ability to carry a spare battery and pop it into the tablet as soon as the first battery died would have been a great option.
Pricing and Availability
The 2019 Wacom MobileStudio Pro 16 is only going to be available in one configuration this time. It will cost $3,499,95 USD, € 3.599,90 EUR or £3.199,99 GBP* at the Wacom E-Store and select retailers.
Conclusion
The 2019 version of the Wacom MobileStudio Pro 16 brings a few nice upgrades and enhancements to the very impressive 2016 version. One one hand I’m happy that it didn’t change too drastically because I was so happy with the 2016 design, but on the other hand I’m a little disappointed that there were no genius big surprise design changes to gush over. The door on the back that allows for upgrading the RAM and SSD modules is a very welcome change, but I so wish the battery was also removable.
If you’ve already got an older Wacom MobileStudio Pro that’s still working well, the 2019 version is probably not a terribly necessary upgrade, but if you’ve been saving up for one, the 2019 MobileStudio Pro is a very worthy upgrade.
The ambidextrous support, programmable bezel hardware controls, NVIDIA Quadro GPU, Wacom Link option, and top-of-the-line pen interface on top of a high end mobile computer that can pack into a large backpack for heavy duty creative pro work on the road is a combination that make the Wacom MobileStudio Pro an excellent tool for your design career.

