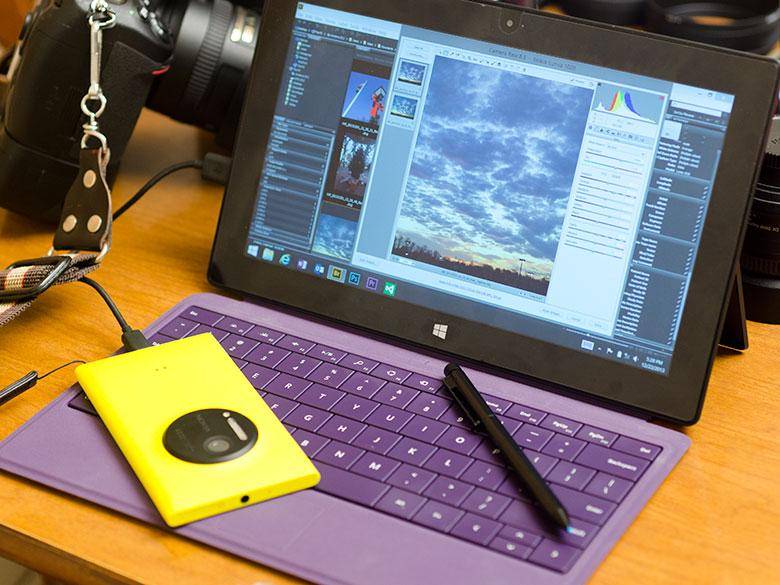
The Nokia Lumia 1020 just received an update last week that enables RAW Adobe DNG file format support when taking photos. There is a new option that you can select in the Nokia Camera app’s settings area. It’s not on by default of course, but the new option enables each shot to save a 5 megapixel JPG plus a full resolution 38 megapixel Adobe Digital Negative RAW file. Now before you go turning it on and trying it out, in order to take advantage of the RAW file format, you’ll need a good RAW image editor on your PC. Personally, I prefer the Adobe Camera RAW plug-in for Photoshop and Bridge, but Adobe Lightroom will also work. Corel AfterShot Pro may need an update in order to support Nokia’s DNG format. The biggest disadvantage to enabling the RAW format is that each DNG file will cost you around 48 Mb of storage space. Yes, that’s a pretty huge file size for each picture, so you’ll want to use this mode sparingly since you’ve only got 32 Gb of storage on the Nokia Lumia 1020. Incidentally, the full resolution 38 megapixel JPGs that the Lumia 1020 makes are about 6-12 Mb each, while the 5 megapixel JPGs are about 1Mb in file size. As far as file size and storage space is concerned, shooting RAW images will fill up your storage space about 5 times faster than JPGs. However, there are some advantages to shooting RAW as any digital photographer will tell you. Working with the RAW data from your camera usually gives you much greater flexibility in your digital darkroom when editing colors and exposures. You also have the added benefit of not seeing any lossy JPG artifacts. Here’s a 200% zoom screen capture of a 38 megapixel JPG taken of a sunset. Sunsets usually have a pretty wide dynamic range especially if you get some of the landscape within the frame, so this seemed like a good way to test the capabilities of the RAW format. In the JPG above, you can see I used Adobe Camera Raw to brighten the shadows and darken the highlights significantly in order to see if I could pull any more detail out of those areas. You can see in the bright sunlight area, there’s a distinctive edge to the tone where the highlights were clipped. We’re not getting any more data out of that area. You can also see that the shadow are pretty muddy and around the building’s bright blue sign you can clearly make out some ugly JPG compression artifacts.

Now take a look at the same shot in the RAW DNG file format! Here we are in Adobe Camera Raw again at a 200% zoom level, and I’ve pushed the highlights and shadows very heavily. However, you can now make out some of the tree shapes in the shadow area where as the JPG was just mush. Also notice the smoothness of the bright highlight area where the sun is setting. You can even make out windows on the house in the background with more fidelity than the JPG of the same resolution.

Another aspect of RAW photos that is important for digital darkroom post processing is the ability to fine tune the white balance and therefore tweak the colors of the image to get them more accurate. The above screenshot is another 200% crop of a full resolution 38 megapixel JPG. This one was taken in a dark room with the Lumia 1020’s flash on. One of the things that I really did not like about the Lumia 1020 was its often inaccurate automatic white balance color temperature when shooting with the Xenon flash on. Images would often look great with the LED focus assist light, but then would render with an undesired color cast when the flash went off. After the “Black” firmware update, the automatic white balance with the flash turned on seems to be much more accurate in my initial tests. So, having to adjust the color temperature afterwards is less important, but with RAW support it’s much easier. Getting back to the image above, you can see some subtle color temperature tweaks were applied, to get the teeth closer to the desired white values, but you can also see that the color tweak is causing the skin color to go a bit too pink. That’s not what we want.

Now with the RAW DNG file (again at 200% zoom level), you can see the interface in Adobe Camera RAW is a bit different. Instead of plus or minus values on the temperature slider, we have Kelvin temperature numeric values to choose from. The camera chooses a color temperature value itself in order to display whites as white and then calculate all of the other colors accordingly. With JPGs, you’re kind of stuck with whatever calculations the camera made for those colors. With the RAW format, we have access to the real data the camera absorbed and can adjust its color rendering values afterwards in case we didn’t like what the camera came up with. Now, you’ll notice that the DNG files also have a lot of noise when you’re looking at them at 200% zoom levels. You kind of have to expect that with such a dense image sensor at such a small size, however since you’ve got the RAW data, you can now run your preferred noise reduction software which will probably give you a lot more control than the default noise reduction that might be applied to the JPG in-camera. If you’d like to play with these files yourself, download both the DNG and high resolution JPG here (RAW vs JPG Flash, and RAW vs JPG Landscape).

Conclusion
If you were at all critical of the Nokia Lumia 1020’s image quality, the “Black” firmware update probably fixed those issues and the RAW file format support just gave you a lot more control over how the images are processed after being captured. Obviously this is a special feature for Photographers and camera geeks who really want to get the most out of their images. Most people will still be extremely impressed with the regular image quality of the 38 megapixel JPGs that the Nokia Lumia 1020 produces… and most people won’t have access to or know how to use RAW image editing applications. While the noise in the RAW image might be an issue if you’re printing your photos at 24″ wide at 300 dpi and use a loupe to look at the details, in most cases you’re probably going to use that 38 megapixel resolution to down-sample for a specific use which will surely make most of that noise disappear.
Want more Lumia 1020 photography tips? Check out How to take incredible photos with the Nokia Lumia 1020.